Data roaming on or off? Let’s manage data effectively

data roaming on or off

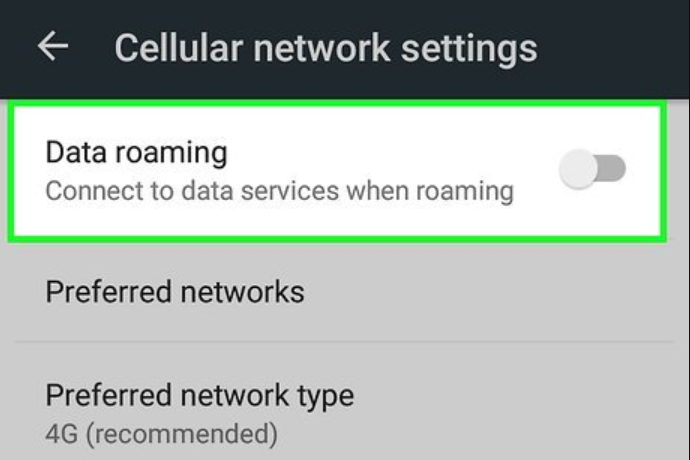
As a frequent traveler, I have often found myself grappling with the dilemma of whether to keep data roaming on or off during my journeys. The ubiquitous recommendation to enable data roaming can be perplexing, especially when you’re unsure about the reasons behind it. It is a common scenario: you’re on the move, trying to stay connected, and someone suggests activating data roaming, but the why remains a bit elusive.

In this article, let’s embark on a journey together through the intricate landscape of mobile data roaming. I will be sharing my personal experiences and insights on data roaming on or off to demystify the question of staying connected while traveling. Let’s continue reading!

What is data roaming?

Data roaming is the service that enables a mobile device to access and use data services, such as internet connectivity, while outside the coverage area of its home network. This is done by connecting to another available cellular network. It enables you to access data services like email, web browsing, messaging, and apps without WiFi.

Data roaming settings can usually be managed on your mobile device to control usage and avoid unintended charges when traveling. Domestic data roaming refers to roaming between networks within the same country, while international data roaming is when connecting to foreign networks. Some carriers offer special international roaming packages or daily usage allotments to reduce costs, which are useful for travelers

However, data roaming often incurs extra charges from your mobile provider since you are using another network. These charges can add up quickly, especially when traveling internationally.

data roaming on or off
Data roaming provides convenient access to data services when traveling outside your home network. Credit: groovy Post

Should I turn data roaming on or off?

Whether you should turn data roaming on or off depends on your specific situation and needs. Here is a breakdown to help you decide:

Turn data roaming On if:

  • You are traveling abroad and need to stay connected for calls, texts, or internet access.
  • You are in a remote area within your country where your carrier’s network is unavailable.
  • You need to access critical information urgently while outside your carrier’s network coverage.

Turn data roaming Off if:

  • You are not expecting to need internet access while outside your carrier’s network.
  • You are concerned about incurring expensive charges from roaming data.
  • You have alternative ways to stay connected, such as Wi-Fi hotspots or downloaded content.

Several additional considerations come into play. Firstly, it is crucial to examine your carrier’s specific roaming rates in the country or region of your destination, as some carriers offer cost-effective roaming packages. Additionally, your typical data usage plays a pivotal role in the decision-making process; if you use minimal data, maintaining data roaming in the off position may be preferable, but heavy reliance on internet access may warrant turning it on.

Moreover, the availability of Wi-Fi at your destination should be factored in. If you can anticipate access to Wi-Fi hotspots, it might serve as a viable alternative to relying on roaming data. Therefore, a comprehensive evaluation of these factors will guide you in making an informed decision about whether to activate or deactivate data roaming based on your unique needs and circumstances.

How to turn data roaming on or off?

Turning off data roaming will prevent your phone from using the internet when outside your carrier’s network, saving you from potential roaming charges. But if you need internet access while traveling, you willl need to turn it back on. Here is the process:

Turn data roaming on/off on Android

data roaming on or off
The process is simply straightforward. Credit: wikiHow Tech

To toggle data roaming on or off on an Android device, follow these steps:

Step 1: Find the Settings icon on your home screen or app drawer.

Step 2: Look for options like “Network & internet,” “Wireless & networks,” or simply “Connections.”

Step 3. This menu manages your cellular network settings.

Step 4. Scroll down and look for a toggle switch or checkbox labeled “Data roaming.”

Step 5. Tap the switch or checkbox to enable or disable data roaming. If it’s currently greyed out, ensure “Mobile data” is turned on first.

Turn data roaming on/off on iPhone

data roaming on or off
It will take you less than a minute to turning data on or off on your iPhone. Credit: 9to5Mac

Here is how to turn data roaming on or off on your iPhone:

Method 1: Settings App

  • Step 1: Open the Settings app on your iPhone.
  • Step 2: Tap on Cellular or Cellular Data.
  • Step 3: If you have a single SIM card or eSIM, simply turn on Cellular Data. Then, tap on Cellular Data Options.
  • Step 4: Toggle the Data Roaming switch on if you want to allow data roaming, or off to disable it.

Method 2: Control Center

  • Step 1: Swipe down from the top right corner of your screen to open Control Center.
  • Step 2: Tap and hold the Mobile Data icon (antenna with bars).
  • Step 3: Tap the Data Roaming button (it looks like a globe with an “R” symbol). The button will be highlighted when data roaming is enabled.

FAQs

   1. What happens if I turn off data roaming?

Turning off data roaming primarily prevents your phone from connecting to and using foreign cellular networks when traveling internationally. This avoids potentially high roaming charges from unintended overseas data usage.

For domestic usage within your carrier’s native coverage area, turning data roaming off generally does not affect your cellular data connectivity or speeds. You will still be able to use data as normal on your carrier’s own network.

   2. Is it better to turn data roaming on?

data roaming on or off
It is better to have data roaming domestically but turn it off when traveling abroad. Credit: eSIM USA

It depends. It is generally better to keep data roaming on for domestic usage while turning it off is recommended when traveling internationally. For domestic usage, having data roaming on or off does not impact connectivity or speeds. So it is fine to leave it on within your carrier’s coverage area. 

However, when traveling overseas, it is best to turn data roaming off to prevent potential roaming charges from unintended foreign network usage, which could add up quickly. In fact, my recommendation is to use WiFi, eSIM or local SIMs as alternatives. 

   3. Will I get charged if I turn on data roaming?

The possibility of incurring charges for data roaming hinges on your mobile phone plan and the geographical location of your phone usage. Typically, charges are incurred if you access the internet, make calls, or send texts outside your carrier’s network coverage area. If your mobile phone plan lacks data roaming or if you surpass your data roaming allowance (in case it is included in your plan), charges are likely to apply.

Wrap up

As my exploration into the realm of data roaming on or off, it is clear that the decision to keep it on or off is not a one-size-fits-all scenario. Whether you are a seasoned traveler or someone gearing up for your first adventure, understanding the nuances of data roaming empowers you to make informed choices about staying connected. 

If this journey through the mobile traveler’s handbook has shed light on your data roaming dilemmas, hit that like button and share this article with fellow adventurers. Thank you for reading!

How much data does hotspot use? Here’s the answer

how much data does hotspot use

As a digital nomad constantly on the move, I have learned that staying connected is a lifeline, but managing expenses is equally crucial. If you rely on a mobile hotspot for your internet needs, understanding how much data it consumes is paramount to avoiding bill shock.

In this article, I will be sharing my insights into a question that has often perplexed me: How much data does hotspot use? Navigating the digital landscape while keeping your wallet in mind is no easy feat, and I have made it my mission to stay updated on the latest information to help you do just that.

How much data does hotspot use?

A mobile hotspot uses between 60MB and 1.3GB of data per hour, depending on the activity:

  • Web browsing uses about 60MB per hour
  • Streaming music uses 60-150MB per hour
  • Video calls use around 80MB per hour
  • Streaming video on YouTube uses 150-300MB per hour
  • Online gaming uses 200MB-300MB per hour
  • Streaming Netflix in HD quality uses around 810MB per hour

The type of data plan also impacts hotspot data usage. Most plans have caps on high-speed hotspot data separate from overall data, usually ranging from 20GB to 100GB per month. Once you hit the hotspot data cap, speeds are slowed.

So, in summary, lighter activities like web browsing and music streaming use less data, while video streaming and HD content use much more data. To avoid surprises, it is helpful to track your monthly hotspot data usage and pick a plan that fits your needs. Going over your high-speed data allowance can result in slower speeds.

how much data does hotspot use
Knowing what you plan to use the hotspot for can help you estimate your data needs. Credit: Slash Gear

How to track your hotspot data usage?

To monitor your hotspot data usage effectively, there are several methods you can employ. 

   1. Check your phone’s Settings:

how much data does hotspot use
An example of checking data usage. Credit: IOS Hacker

Firstly, you can check your phone’s settings for specific details. This is the easiest method for users to tracking data hotspot usage just in simple steps.

On Android devices, navigate to Settings > Network & Internet > Hotspot & tethering, and look for the “Hotspot data usage” option. This may display your current usage or allow you to set data limits.

For iPhones, go to Settings > Cellular > Personal Hotspot to find your current hotspot usage under “Personal Hotspot Usage.”

   2. Use your carrier’s app or website

Alternatively, you can utilize your mobile carrier’s app or website. Most carriers offer online platforms where you can access detailed data usage information, including hotspot usage. Logging into your account will lead you to a dedicated section for data usage, often providing more comprehensive tracking and historical data than your phone’s settings.

   3. Utilize tracking apps

how much data does hotspot use
For a more tailored approach, consider using third-party apps designed for tracking data usage. Credit: Google APIS

Another option is to employ third-party apps designed for this purpose. For Android users, the Google app Datally can track overall data usage and specifically monitor hotspot data. Data Usage is another app that provides detailed statistics, app breakdowns, and customizable alerts. iOS users can use DataMan Next for comprehensive data tracking, including hotspot usage, with customizable alerts and data management tools.

Additionally, it is advisable to set data limits using your phone or carrier app to prevent overage charges. Regularly checking your hotspot data usage ensures you stay informed about your consumption. Whenever possible, prioritize connecting devices to Wi-Fi instead of your hotspot to conserve data. Finally, be mindful of data-intensive activities, such as streaming video or downloading large files, when using the hotspot to optimize usage.

FAQs

   1. Does using a hotspot cost money?

The cost of using a hotspot hinges on your specific mobile plan and carrier. Generally, you won’t incur additional charges if your plan includes hotspot data. Many unlimited plans offer a dedicated hotspot data allowance, allowing you to use a specified amount within your regular plan without extra fees. Staying within your data limit, encompassing both phone and hotspot devices, ensures no additional charges. 

Nevertheless, certain scenarios may lead to incurred costs. Exceeding your hotspot data allowance typically results in overage fees according to your carrier’s pricing. Additionally, basic or older plans may lack hotspot functionality, incurring extra charges if you use a hotspot on such plans. When roaming or utilizing international data, charges may apply based on your carrier’s roaming policies or international data rates. 

   2. Does a hotspot use a lot of data?

how much data does hotspot use
The amount of data hotspot usage can be quite considerable. Credit: Evening Standard

Using a mobile hotspot can use a significant amount of data depending on what activities you are doing:

  • Streaming: High-definition video streaming can gobble up to 7GB per hour, while standard definition uses about 1.5GB. Music streaming is much lighter, at around 70MB per hour.
  • Gaming: Online gaming typically uses 40-150MB per hour, but intense multiplayer games can reach 500MB.
  • Web browsing: Casual browsing uses about 50MB per hour, but watching embedded videos or downloading files can quickly increase that.
  • Video calls: Zoom calls use 540MB to 1.62GB per hour depending on video quality.

To sum up – yes, using a mobile hotspot does use a lot of data if you are streaming video, gaming, downloading files or connecting multiple devices. Light browsing uses small amounts, but video and downloads eat up cellular data allotments quickly through a hotspot. 

   3. How much data does hotspot use for Netflix?

how much data does hotspot use
The answer depends on your streaming quality. Credit: Robots.net

The data consumption involved in using your hotspot for Netflix depending on the video resolution:

  • At low quality setting (360p), Netflix uses approximately 0.3GB per hour.
  • At a medium quality (480p), Netflix streaming over a hotspot uses about 0.5GB per hour.
  • For high definition 720p streaming, usage goes up to 1.5GB per hour.
  • Full HD 1080p streaming on Netflix via a mobile hotspot can use around 3GB per hour.

   4. Is hotspot free if you have unlimited data?

No, unlimited cellular data plans do not typically include free unlimited mobile hotspot data usage. Going over the hotspot data allowance results in slower speeds but no overage charges on unlimited plans.

   5. How many hours is 15 GB of hotspot?

So in summary, 15GB of mobile hotspot data could provide 50 hours of light web browsing, around 5 hours a day of low-resolution video streaming, or 15 hours of standard definition Netflix streaming. The usage time varies significantly based on the online activities, with video streaming consuming large amounts of data. But for general light internet usage, 15GB of data would translate to approximately 50 hours of hotspot connectivity.

Wrap up

In the realm of staying digitally connected, understanding “How much data does hotspot use?” is the key to navigating the intricate web of expenses and connectivity. As we conclude this exploration, it is clear that the variables are diverse — from streaming to gaming, each activity demands its data toll. The number of devices, network quality, and resolution settings further influence this digital data dance.

Finally, don’t leave without sharing this article with your friends. If you have further questions related to how to stay connected during travel, please leave a comment and I can answer you as soon as possible!

What is sm-dp+ address? How to find sm-dp+ address?

sm-dp+ address

In our digitally interconnected world, staying connected while traveling is paramount, and the advent of eSIM technology has been instrumental in achieving this. Yet, as we navigate the realm of eSIM activation, we often encounter terms like “SM-DP+ address” without a clear understanding of their significance. If you have found yourself perplexed by these seemingly cryptic elements in an email activation message, fear not – I’m here to demystify the concept for you.

In this article, I will delve into the pivotal role of the SM-DP+ address in the eSIM activation process. As we explore the importance of this key identifier, I will guide you through the steps of finding and setting up the SM-DP+ address. By the end of our journey, you will have a comprehensive understanding of what the SM-DP+ address entails and how it plays a crucial role in ensuring a seamless and secure eSIM activation experience. 

What is sm-dp+ address?

The SM-DP+ address, or “Subscription Manager Data Preparation Plus Address,” is a distinctive code that plays a crucial role in linking a device equipped with an embedded SIM (eSIM) to a mobile network operator’s servers. This connection facilitates the activation and management of eSIM services.

sm-dp+ address
The SM-DP+ address thus plays a pivotal role in ensuring the secure and efficient management of eSIM functionalities. Credit: Talk Home Blog – Talk Home Mobile

How does sm-dp+ address work?

The SM-DP+ address serves as a crucial link in the communication chain between your eSIM-enabled device and your mobile network operator’s server, facilitating the exchange of information and management of your eSIM profile. 

   1. Initiating the connection

The process begins with your device seeking an internet connection, either through Wi-Fi or cellular networks. Depending on your device and eSIM configuration, the SM-DP+ address is either automatically retrieved from the eSIM or manually entered.

   2. Connecting to server

Once armed with the SM-DP+ address, your device employs it as a specialized URL to establish a connection with the designated server owned by your mobile network operator. This server serves as the repository for all eSIM profiles associated with their subscribers. Following a secure connection, your device communicates with the server using the SM-DP+ address, initiating actions such as downloading new eSIM profiles, updating existing profiles, deleting profiles, or sending troubleshooting information.

   3. Data exchange

sm-dp+ address
The operator’s SM-DP+ server cross-references the address with its database to verify the device and eSIM. Credit: Spectrum

The server, upon receiving the request, validates it through the SM-DP+ address and other security checks. If the request is legitimate, the server responds with the required data, be it a downloaded eSIM profile, confirmation of an update or deletion, or requests for additional troubleshooting information. Your device interprets this response, installing downloaded profiles onto its eSIM chip, updating internal settings for confirmed changes, or providing requested troubleshooting data.

   4. Server response

To safeguard this process, security measures such as encryption and authentication protocols are employed to prevent unauthorized access and manipulation of eSIM profiles. The SM-DP+ address thus plays a pivotal role in ensuring the secure and efficient management of eSIM functionalities.

How to find sm-dp+ address?

Here are the 5 common ways to find your SM-DP+ address:

   1. Check the eSIM packaging or email

If you received your eSIM physically, the SM-DP+ address is often printed on the packaging, along with the QR code and activation code. If you purchased your eSIM online, the provider may have emailed you the SM-DP+ address and activation instructions.

   2. Check for a QR code

sm-dp+ address
You can check your provided QR code to find the SM-DP+ address. Credit: eSIMdb

Some eSIM providers provide a QR code that contains the SM-DP+ address and activation code. If you have a QR code, you can scan it using your device’s camera or a QR code reader app to access the information.

   3. Contact your mobile network operator

If you can’t find the SM-DP+ address in your documents, reach out to your mobile network operator’s customer support. They can provide you with the address and any necessary activation instructions.

   4. Look in your device settings (if applicable)

Some devices, like iPhones and iPads, display the SM-DP+ address within their Cellular settings. Here’s how to check on these devices:

  • Go to Settings > Cellular (or Mobile Data).
  • Tap on “Add Cellular Plan.”
  • If prompted, select “Enter Details Manually.”
  • The SM-DP+ address might be displayed here, along with other details like the activation code.

   5. Check your online account (if applicable)

sm-dp+ address
Look for eSIM details and you will see your SM-DP address. Credit: eSIM Go Support

If you purchased your eSIM through an online account with your mobile network operator, the SM-DP+ address might be available within your account details or eSIM management section.

How to set up sm-dp+ address?

It is essential to follow these steps to ensure a secure and successful setup of the SM-DP+ address for your eSIM activation and lifecycle management.

Set up sm-dp+ address on iPhone

Here are the steps to set up the SM-DP+ address on an iPhone:

  • Step 1: Go to the Settings app on your iPhone.
  • Step 2: Tap on Cellular or Mobile Data.
  • Step 3: Select Add Cellular Plan.
  • Step 4: Scan the QR code provided by your service provider or tap on Enter Details Manually at the bottom
  • Step 5: Enter the SM-DP+ Address and activation code manually, if required.
  • Step 6: Tap on Done to complete the setup.

Set up sm-dp+ address on Android

Carefully following the provided instructions is important for proper configuration. Here are some steps you need to follow:

  • Step 1: Go to the Settings app on your Android device.
  • Step 2: Tap on Network & Internet, then tap on Mobile network.
  • Step 3: Tap on Add a new plan or Add a new network.
  • Step 4: Select Add using the QR code or SM-DP+ Address and activation code.
  • Step 5: If you select Add using a QR code, scan the QR code provided by your service provider. If you select Add using SM-DP+ Address and activation code, manually enter the SM-DP+ Address and activation code.
  • Step 6: Once you have entered the SM-DP+ address and activation code correctly, tap on Save to complete the setup.

FAQs

   1. Where to find the SM DP+ address?

There are two main ways to obtain your SM-DP+ address. First, you can contact your mobile carrier or service provider. They will provide you with the SM-DP+ address and an activation code to manually set up your eSIM if you run into issues with automatic activation. You may receive this information by email or other communication when you sign up for an eSIM data plan.

Or, the SM-DP+ address may be included on the eSIM voucher, activation instructions, or QR code provided by your carrier. If you received a physical card or email with eSIM details, check there for the address. When you scan a QR code to activate an eSIM, the code contains network authentication details including the SM-DP+ address.

   2. What is the SM DP+ address sample?

Here’s an example of what an SM-DP+ address might look like: LPA:1$rsp.truphone.com$JQ-1L1YVT-1WXVJ0N

Let’s break this down:

  • LPA:1: This indicates the version of the LPA (Local Profile Assistant) protocol being used.
  • rsp.truphone.com: This is the actual SM-DP+ address, which points to the Truphone server that manages the eSIM.
  • JQ-1L1YVT-1WXVJ0N: This is the activation code, which is a unique identifier for the specific eSIM profile on the Truphone server.

Wrap up

In conclusion, the SM-DP+ address emerges as a linchpin in the eSIM activation landscape, ensuring secure connectivity. The SM-DP+ address, often overlooked in its complexity, is, in fact, the key to a world of connectivity possibilities, reaffirming its status as an essential component in the dynamic landscape of modern communication. By understanding its role and implementing it effectively, you empower yourself to navigate the digital realm seamlessly. 

Finally, don’t hesitate to leave a comment to let me know whether you have any questions related to this topic. And if you find this article helpful, please share it with your friends too!

The 7+ best eSIM providers for international travel

Have you ever dreamed about traveling without having to worry about an internet connection? eSIM technology has turned that dream into reality. With the best eSIM providers, international travel is not only simpler, but you also ensure you always have a stable internet connection, no matter where you are in the world. Let’s explore the best eSIM providers options for those who love to explore the world.

The 7+ best eSIM providers for your trip

Depending on your specific needs, each eSIM provider will have its own advantages and disadvantages. Here is an overview of some of the best eSIM providers today:

1. veteranmax

best eSIM providers
veteranmax is rated as one of the best eSIM providers for international travel. Credit Image: veteranmax

Each member of veteranmax has an immense passion for exploration, cultivating a deep love of travel, driving our dedication to bringing unforgettable eSIM experiences to you. We’re innovative and constantly working to pioneer and simplify global connectivity, ensuring connectivity is always at your fingertips for seamless adventures.

What I like: 

  • Easy use: Easily configure your data plan with a quick scan of a straightforward QR code. Upon arrival, activate your eSIM for instant connectivity. Rest assured, all our products include comprehensive instructions for seamless setup. In addition, our diverse range of packages caters to every adventure, whether it’s a brief escapade or an extended expedition, promising uninterrupted connectivity throughout your travels. 
  • No roaming charges: Eliminate those pesky roaming fees with the freedom of eSIM technology, allowing you to journey effortlessly without the weight of additional charges. Stay globally connected worry-free, as eSIM ensures a seamless experience without unexpected costs.
  • Community & Social Responsibility: By advocating for the adoption of eSIMs over traditional physical SIM cards, we strive to minimize our collective environmental footprint. This initiative stands as our pledge toward a more sustainable future while empowering our customers with top-notch connectivity solutions.

What I don’t like:

  • veteranmax is a relatively new eSIM provider. However, this does not affect our enjoyable eSIM utility experience.

Not only is veteranmax a mobile service provider, but we are also a companion on every journey, always ready to create unlimited connections, and bring maximum freedom and convenience to all customers. Try using our eSIM and give us feedback!

2. Airhub

best eSIM providers
Airhub is rated as one of the best eSIM providers. Credit Image: Airhubapp

Airhub is rated as one of the best eSIM providers. It emerges as a vast online marketplace offering eSIMs across 190+ countries globally. The extensive range of eSIM plans includes data, local and international call minutes, and SMS services.

  • Price: Starts at $11 for 10GB per month
  • Supported Devices: Android, iOS
  • Website: www.airhubapp.com 

What I like:

  • Intuitive and clean app and website design: The Airhub app features a clean and intuitive interface, simplifying the user experience. Upon login, users can navigate through country selection via three tabs: local eSIMs, regional eSIMs, and Monthly plans (with the global package included in the regional eSIM category).
  • Excellent speed across most countries: Airhub’s regional plans present enticing pricing options, spanning North America, APAC, Africa, the Middle East, and Europe. Notably, the Europe plan stands out for those embarking on a European tour, covering 49 countries with plans starting at $11 per month, offering 3GB data. 
  • Plans encompass data, voice minutes, and SMS: While typical eSIM providers offer 3-5 plans per country, Airhub boasts up to 15 varied plans for each nation, empowering users to choose the ideal match for their preferences. The majority of plans on the platform are prepaid, with select postpaid options available, notably in the United States. 

What I don’t like:

  • Checkout incurs payment service fees
  • Limited regional plans: However, its coverage in Latin America is notably lacking, with limited or absent plans in countries such as Cuba, Chile, Brazil, Argentina, Mexico, Paraguay, Uruguay, and Ecuador.

In summary, Airhub distinguishes itself through diverse and competitive plans, minimalist app design, and user-friendly website, making it an ideal choice for budget-conscious travelers and remote workers seeking reliable eSIM solutions.

3. Airalo

Airalo emerges as a top-tier eSIM provider. The standout feature lies in strong partnerships with local telecommunication companies worldwide, enabling it to maintain the position as a cost-effective leader in the industry.

  • Price: Starting at $4.5 for 1GB of data over 7 days
  • Devices supported: Android, iOS
  • Website: www.airalo.com 

What I like:

  • Extensive coverage across approximately 200 countries: Airalo offers travelers an affordable and dependable solution across more than 200 countries. Moreover, the platform offers a dedicated global plan granting access to approximately 84 countries, catering specifically to international travelers
  • Tailored, customizable plans for all users: Airalo presents a diverse portfolio of 7 regional plans, including coverage for regions like Latin America and the Caribbean Islands, areas often underserved by other eSIM providers.
  • Cost-efficient options available: Users can select data volumes ranging from 1GB to 20GB, available over periods from 7 to 180 days.

What I don’t like:

  • Most packages exclude voice minutes: One aspect to consider before opting for an Airalo eSIM is that the majority of plans do not include voice minutes; they primarily offer data-only plans. For users heavily reliant on voice calls, exploring alternative options might be more suitable, although internet calls remain a viable communication method.
  • Higher pricing in some African regions: It’s essential to note that Airalo’s pricing structure is influenced by the destination, local data costs, validity periods, and data limits.

The above characteristics have made it one of the best eSIM providers currently.

4. Nomad

best eSIM providers
Nomad is also the best eSIM provider for international travel. Credit Image: theroams.co.uk

Next, Nomad is also the best eSIM provider. It stands out as an excellent choice for short-term travelers seeking an affordable travel eSIM. Tailored for brief excursions of 7 to 15 days, Nomad offers both regional and individual country plans.

  • Price: starting at $1.3 per GB, $6 for 7 days
  • Devices supported: Android, iOS
  • Website: www.getnomad.app 

What I like:

  • User-friendly app: Nomad’s user-friendly app simplifies navigation, enables real-time data tracking, and facilitates the addition of extra data on the go. The setup process, featuring step-by-step guidance with visual aids, caters to users seeking simplicity in installation.
  • No hidden costs: Nomad ensures transparent pricing without one-time connection or SIM card fees, providing peace of mind against unexpected charges or exorbitant roaming costs.

What I don’t like:

  • No live chat support

While lacking live chat, Nomad offers reliable 24/7 message support for inquiries. Overall, it’s a solid choice for frequent travelers, offering affordable short-term packages and an effortless interface, backed by commendable user-friendliness and dependable customer support.

5. Holafly

Holafly boasts some of the best eSIM cards offering unlimited data plans, perfect for those who require uninterrupted connectivity. With Holafly, concerns about data limits vanish, allowing you to freely share videos and photos with your family across various countries. Even where unlimited data isn’t available, Holafly’s data limits surpass many competitors.

  • Price: Commencing at $19 for a 5-day unlimited internet plan
  • Devices supported: Android, iOS
  • Website: https://esim.holafly.com/ 

What I like:

  • Payment available in Euros, US dollars, or Mexican pesos: Holafly simplifies eSIM installation through QR code scanning and provides guidance for every step. Payment methods include credit cards, debit cards, PayPal, Google Pay, Apple Pay, or manual installation using a code if QR scanning isn’t preferred.
  • Most eSIMs offer unlimited data.: Holafly offers impressive flexibility in plan durations, catering to trips lasting 5 to 90 days across approximately 160 countries they serve.
  • Useful features like app-based validity tracking: This enables users to conveniently monitor the expiration or duration of their eSIM plans directly within a dedicated mobile application.

What I don’t like:

  • Lack of support for data sharing among devices: Holafly currently doesn’t support data sharing among devices, an essential consideration for families intending to use a single eSIM.
  • Positioned as one of the more expensive options in the market: While Holafly’s data plans excel, not all plans include calls or SMS service. Nevertheless, leveraging internet-based communication apps like WhatsApp or Skype serves as a practical alternative in today’s communication landscape.

6. GlobaleSIM

best eSIM providers
GlobaleSIM provides eSIM plans covering 150+ countries. Credit Image: esims.io

GlobaleSIM caters to global travelers with eSIM plans spanning more than 150 countries and affiliations with over 400 network carriers. As one of the early adopters of eSIM technology since its launch in 2016, the service provides a range of plans tailored for various countries.

  • Price: Starting at $3.00 for 500MB in 63 countries
  • Devices supported: Android, iOS
  • Website: https://globalesim.app/ 

What I like:

  • Extensive Coverage: Partnerships with over 400 carriers worldwide
  • Transparent Pricing: No hidden costs, clear pricing structure. Including: most popular plan (available in 63 countries); most popular + plan (available in 93 countries); special plan (available in 115 countries); and special + plan (available in 143 countries). For instance, the “Most Popular Plan” offers 500MB of data for 5 days at $3.00, with options to add call minutes and select a US, UK, or Canadian number. 
  • Simplify the process: Unlike many eSIM providers requiring account creation, GlobaleSIM streamlines the process. Simply provide basic details like name, surname, and email address, and proceed to payment via PayPal or credit card.

What I don’t like:

  • Lack of Dedicated App: A notable drawback is the absence of a dedicated app, necessitating direct purchases via their website.
  • Customer Service Limitations: Support mainly through email, slower response times. Customer support primarily relies on emails, lacking real-time chat support. Finding their support section isn’t intuitive, buried deep within the website, leading to subpar customer service experience.

In summary, GlobaleSIM offers easy access to global eSIM plans, making it a viable choice for travelers seeking hassle-free setup and straightforward purchasing options.

7. BNESIM

BNESIM is one of the next best eSIM providers on this impressive list. It stands out with its extensive coverage across more than 170 countries, surpassing the offerings of many providers like Nomad. Regardless of your travel destination, BNESIM ensures a suitable plan is available for your needs. 

What I like:

  • Simple account management tools ideal for beginners: BNESIM’s website hosts an extensive “Support” section with comprehensive guides for installing eSIMs on various devices, making the process easier with visual aids.
  • Diverse range of plans catering to various needs: A significant advantage with BNESIM is “pay-as-you-go” plans, free from any expiration date. For instance, with the $6.73 1GB USA data plan, your usage remains valid until you exhaust the data without any time constraints. This flexibility caters well to users with minimal data requirements.

What I don’t like:

  • Customer support might not meet expectations: BNESIM primarily focuses on short-duration plans, with a maximum validity of 30 days, which might not suit those seeking longer-duration options. Additionally, the “auto-renewal” feature requires manual cancellation through the website or app, which might inconvenience some users.

8. AloSIM

The last name we want to mention among the best eSIM providers is AloSIM. It is based in Canada, offers budget-friendly prepaid data SIMs. The AloSIM app boasts an innovative data calculator, estimating your internet usage for daily, weekly, and monthly needs. This feature underlines the brand’s commitment to transparency, preventing overspending on unnecessary data.

What I like:

  • Supports data sharing: Data sharing support enables personal hotspot connections or sharing with others. The platform also offers an extensive range of 11 regional plans, among the highest in the market.
  • Auto-installation ease: AloSIM provides three easy eSIM installation methods
  • Automatic installation: Allows immediate plan activation.
  • QR code scanning: A common activation method among eSIM providers.
  • Manual installation: Offers step-by-step instructions for setup and activation.
  • Cost-effective pricing: AloSIM’s prices are notably competitive. For instance, the 5GB for 30 days plan is available for just $16 in the US, a significant difference from typical home SIM plans. 

What I don’t like:

  • No phone or SMS plans: Similar to most data-only eSIMs, AloSIM doesn’t include a phone number, and there’s no unlimited data plan available for heavy users.
  • Lack of unlimited data plan: The absence of a regional plan for Africa or a comprehensive Asian plan is noticeable. The Asian regional plan covers just five Southeast Asian countries, making it less suitable for Eastbound travelers.

How to choose a suitable eSIM provider?

How to choose the best eSIM provider that suits your needs and desires. Credit Image: PCMag

These 10 factors will help you choose the best eSIM provider that suits your needs and desires.

  • Scope of service: 

Clearly define your needs. Do you need an eSIM for your mobile phone, tablet, or IoT device? Do you need it for travel, work, or use in a stationary device? This will limit your options to suitable suppliers.

  • International coverage: 

If you frequently travel or work in multiple countries, choose an eSIM provider with extensive international coverage to ensure flexibility for use in different locations.

  • Price lists and packages: 

Carefully compare price lists and packages of different providers. Sometimes, packages may change depending on your intended use.

  • User reviews: 

Learn about other users’ experiences with that provider. Read online reviews and opinions from real users for a more detailed overview.

  • Customer support: 

Evaluate the quality of customer support services from the supplier. Timely and effective support is important when experiencing technical issues or needing account assistance.

  • Flexibility in service plans: 

Some eSIM providers offer great flexibility, allowing you to change service plans or expand coverage without too much hassle.

  • Security and confidentiality: 

Check the security and confidentiality measures the provider has in place to ensure your personal information is kept safe.

  • Compatibility: 

Make sure your carrier’s eSIM can work on your device. Not all devices support all eSIM carriers.

  • Network stability: 

Check if the provider’s network is highly stable, especially in the area you frequently use.

  • Cancellation and refund policies: 

Check the provider’s cancellation and refund policies so you have the flexibility to change services when necessary.

Combining and carefully considering the above factors will help you choose the best eSIM provider that suits your specific needs.

FAQs

1. Which carrier has the best eSIM?

In reality, no provider is perfect for everyone. Determining the best eSIM provider can depend on many factors.

Specific reasons for considering these providers may include broad service coverage, flexibility in plans, positive reviews from real users, compatibility with multiple devices, and simplicity in using the service. However, the choice depends on each user’s specific needs and personal preferences.

2. Can I use more than one eSIM provider?

Yes, you can use more than one eSIM provider on the same device with the flexibility and convenience. However, using multiple eSIM providers can also cause complexity in service management and costs. Careful consideration should be given before deciding to use multiple eSIM providers to ensure that this suits your needs and priorities.

Wrap up

With flexibility, diverse features, and excellent location capabilities, the best eSIM providers have changed the way we experience travel. Absolutely, each eSIM provider has its own purpose and mission. And veteranmax believes that our mission is not only to provide services but also to create unforgettable memories in each of your trips. Now, are you confident in setting foot in the world with this useful article? Please leave comments and regularly follow us to collect more interesting shares every day!

How to switch from eSIM to physical SIM: A detailed guide 

how to switch from esim to physical sim

Making the move from a traditional SIM card to an eSIM can be a bit nerve-wracking. I remember feeling worried about losing my physical SIM card and not being able to switch back if I needed to. If you’re feeling the same way, you’re not alone. I went through it too. 

But here’s the good news – I found out that switching back from eSIM to a physical SIM is totally possible. It happened when I took my phone in for repair, and the technicians assured me that it is an easy process. 

Excited to share this useful info with you, I have put together a step-by-step guide on how to switch from eSIM to physical SIM. I will cover everything you need to know to ensure a smooth transition, addressing any worries you might have along the way. 

Can I convert eSIM back to physical SIM?

No, you can’t directly convert an eSIM back to a physical SIM. Once a device is provisioned with an eSIM, the information is typically stored electronically, and the physical SIM card is not present.

eSIMs are designed to be embedded directly into the device’s hardware or activated through a QR code. The process is usually irreversible in terms of converting it back into a traditional physical SIM card.

However, the good news is you can switch back to using a physical SIM. The process is simple, and I will explain it in the next part of the section.

how to switch from esim to physical sim
It is impossible to convert an eSIM into a physical SIM. Credit: Youtube

How to switch from eSIM to physical SIM?

Here is a detailed guide on how to switch from eSIM to physical SIM:

Step 1: Contact your carrier

how to switch from esim to physical sim
Reach out to your carrier’s customer support to initiate the process. Credit: Airalo

First, you will need to reach out to your cellular carrier’s customer support, either by phone, online chat, or in-person at a store. Then, inform them that you would like to switch from eSIM to a physical SIM card. They will verify your account details and guide you through the process.

Step 2: Request a new physical SIM

Ask your carrier to provide you with a new physical SIM card. They might offer to mail it to your address or have it available for pickup at a store.

Step 3: Deactivate the eSIM (if necessary)

In some cases, your carrier might deactivate the eSIM remotely for you. If not, you might need to deactivate it manually:

  • iPhone: Settings > Cellular > Cellular Plans > Tap the eSIM plan > Remove Cellular Plan.
  • Android: Settings > Network & Internet > Mobile Network > Advanced > Carrier > Remove carrier profile.
  • Other devices: Consult your device’s user manual or carrier’s instructions.

Step 4: Insert the physical SIM

how to switch from esim to physical sim
Now you can insert the physical one into your phone. Credit: ZDNet

Once you have the new physical SIM, carefully insert it into your device’s SIM card slot, following the correct orientation.

Then, you need to follow your carrier’s specific instructions to activate the physical SIM card. This might involve:

  • Calling a designated activation number.
  • Visiting a website and entering activation codes.
  • Using a carrier-specific app.

Step 5: Confirm activation

Ensure that your device now displays cellular signal bars and network connectivity. You can test calls, text messages, and data usage to confirm successful activation.

Additional considerations:

  • Backup data: As a precaution, it’s always a good idea to back up your important data before making changes to SIM cards.
  • Device compatibility: Verify that your device supports both eSIM and physical SIM functionality.

Wrap up

To sum up, this article has guided you through the process of how to switch from eSIM to physical SIM card. With just five simple steps, the journey from eSIM to physical SIM is uncomplicated.

Don’t leave without sharing this article with your friends. And if you have any specific questions, feel free to provide more details in the comment section, and I will do my best to assist you!

Can you use an eSIM on a locked phone: An explanation

can you use an esim on a locked phone

Have you ever found your phone locked, leaving you in a state of worry about accessing your data? Then ask yourself several times, “Can you use an eSIM on a locked phone?” I have been in the same predicament and, fortunately, found a solution using eSIM. The fear of being locked out can be daunting, but rest assured, there are viable steps to save your data even before unlocking the device. 

Can I use eSIM on a locked phone?

No, you can not use an eSIM on a locked phone. A locked phone is restricted to work only with the network it was originally purchased from. This means their systems won’t recognize or allow activation of an eSIM from another carrier.

can you use an esim on a locked phone
You can not use an eSIM on a locked phone. Credit: Buyback Boss

eSIMs rely on carrier authorization for activation, which involves communication between the eSIM profile and the carrier’s network. Since a locked phone is restricted to its original network, it cannot properly communicate with other carriers’ systems to activate an eSIM from them.

However, you may need to contact your carrier to obtain an eSIM activation code or QR code, and they can assist you with the setup process.

How to use eSIM on a locked phone?

Generally, you cannot use eSIM on a locked phone. The phone needs to be unlocked to accommodate any service provider’s eSIM, including the one it’s originally locked to.

Step 1: Contact your carrier

Reach out to your current carrier to initiate the phone unlock process. Inquire about their specific requirements and any associated fees for unlocking. Be prepared to provide essential information such as your account number and the device’s IMEI (International Mobile Equipment Identity) number.

Step 2: Unlocking process

can you use an esim on a locked phone
The unlock process may requires some time. Credit: Coolmuster

If your carrier approves the unlock request, they will typically perform the unlock remotely. You may receive detailed instructions or an unlock code to finalize the process. Follow the provided guidelines carefully.

Step 3: Install eSIM profile (If unlocked)

Once your phone is successfully unlocked, proceed to install the eSIM profile. Follow your carrier’s instructions, which often include scanning a QR code or entering an activation code. This step is crucial for configuring your device to use the eSIM for network connectivity.

Step 4: Confirm activation

can you use an esim on a locked phone
Go to the Settings and check the availability of your eSIM. Credit: Slash Gear

After installing the eSIM profile, confirm the activation by checking your phone’s network settings. Ensure that the eSIM is recognized, and the network connection is established. Make a test call, send a text, or use mobile data to verify that the eSIM is functioning as expected.

Note: Not all carriers or phones support eSIM, so check with your carrier and verify your phone’s capabilities before attempting these steps. Additionally, unlocking a phone may have implications on your warranty or service contract, so be sure to understand the terms and conditions of your carrier.

Wrap up

In conclusion, the article has addressed the question, “Can you use an eSIM on a locked phone? The answer is indeed impossible, so you need to take some steps to unlock your phone first. 

If you found this guide helpful, don’t forget to hit the like button and share it with others who might benefit. Let your friends and family with the knowledge to unlock the full potential of their devices. Have additional questions or insights? Feel free to leave a comment below. Stay connected and stay informed!

How to reactivate eSIM? A Step-by-step guide for beginners

how to reactivate esim

Ever found yourself in a situation where your eSIM suddenly goes inactive, leaving you disconnected and frustrated? I have all been there. The assumption that reactivating an eSIM is a complicated process often leads me to contact my phone carrier, only to be met with busy lines. 

Faced with this challenge, I took matters into my own hands and successfully reactivated my eSIM by navigating through my phone’s settings. Actually, I have succeeded. 

In this guide, I will share the simple steps on how to reactivate eSIM. Therefore, you can do it yourself at home without spending time seeking help. 

How to reactivate eSIM on iPhone?

how to reactivate esim
Make sure your iPhone is connected to Wi-Fi or a cellular network when trying to reactivate your eSIM. Credit: The Jarkatar Post

The process for reactivating an eSIM on your iPhone depends on why it’s deactivated and how you want to reactivate it. Here are a few options to consider:

Reactivating a deactivated eSIM profile

If your eSIM is simply switched off and you want to turn it back on, follow these steps:

  • Go to Settings > Mobile Data.
  • Tap on the eSIM profile you want to reactivate.
  • Toggle the switch next to “Turn On This Line” to ON.

Reactivating a deleted eSIM profile

If you accidentally deleted your eSIM profile, you’ll need to contact your carrier to get it re-provisioned. They can provide you with a new QR code or activation details to download the profile again. Once you have the new information, follow these steps:

  • Go to Settings > Mobile Data.
  • Tap on “Add Cellular Plan”.
  • Choose “Scan QR Code” or “Enter Manually” depending on your carrier’s instructions.
  • Scan the QR code or enter the activation details provided by your carrier.

Reactivating an eSIM after network reset

If you performed a network reset on your iPhone, all eSIM profiles will be removed. To reactivate them, you’ll need to follow the steps above based on whether they were simply deactivated or deleted.

Reactivating eSIM after updating carrier settings

Sometimes, updating your carrier settings can temporarily deactivate your eSIM. In most cases, it should automatically reactivate within a few minutes. If it doesn’t, try restarting your iPhone. If that still doesn’t work, contact your carrier for further assistance.

How to reactivate eSIM on Android?

how to reactivate esim
Reactivation options might vary slightly depending on your specific Android device model and carrier. Credit: aloSIM

Here is how to reactivate an eSIM on Android:

Check for a simple deactivation

  • Open Settings > Network & internet > SIMs.
  • Locate the eSIM profile you want to reactivate.
  • If it is simply deactivated, toggle the switch next to it to ON.

Re-download a deleted profile

  • If the profile is missing, tap “Add mobile plan.”
  • Choose “Download a SIM instead.”
  • Scan the QR code provided by your carrier when you first activated the eSIM.
  • Follow the prompts to complete the download and activation.

Contact your carrier for assistance

If you cannot reactivate the eSIM yourself, contact your carrier via hotline for help. They can provide you with instructions or re-provision the eSIM remotely.

Wrap up

To sum up, the process of how to reactivate eSIM is straightforward. With these steps, you’re now equipped to tackle any eSIM reactivation challenge with confidence. Go forth, download, scan, and enjoy the seamless connectivity this technology offers. 

Finally, if you find this article helpful, please like and share it with your friends. Thank you for reading. 

Can I get eSIM without a physical SIM?

can i get esim without physical sim

With the advent of eSIM (embedded SIM) technology, the need for a physical SIM card is becoming less of a necessity. Recently, having acquired a new iPhone and contemplating a shift towards a more streamlined and modern connectivity experience, I found myself pondering a crucial question: Can I get an eSIM without a physical SIM?

The good news is that the landscape of mobile technology has indeed evolved, and I can activate an eSIM without the need for a traditional physical SIM card.

In the following sections, I will delve deeper into the seamless process of obtaining an eSIM. Let’s explore together. 

Can I get eSIM without a physical SIM?

Yes, it is possible to obtain an eSIM (embedded SIM) without a physical SIM card. An eSIM is a digital SIM that is embedded directly into a device, eliminating the need for a physical SIM card. Many mobile carriers and device manufacturers support eSIM technology, allowing you to activate a digital SIM profile on your device without the need for a physical card.

can i get esim without physical sim
You can get an eSIM without a physical SIM. Credit: Digital Trends

How to set up eSIM without a physical SIM?

Setting up an eSIM without a physical SIM involves a few steps, and the exact process may vary depending on your device and carrier. However, here are five general steps that should guide you through the process:

Step 1: Check device compatibility

Ensure that your device supports eSIM technology. Not all devices are equipped with eSIM capabilities, so you will need to check your device specifications or contact the manufacturer to confirm compatibility.

Click here to check the compatibility.

Step 2: Contact your carrier

Reach out to your mobile carrier to verify that they support eSIM activation. Not all carriers offer eSIM services, and support may vary by region. If your carrier supports eSIM, they will provide you with the necessary information and instructions.

Step 3: Receive eSIM activation details

can i get esim without physical sim
The carrier may provide you with a QR code for your eSIM profile. Credit: Thales Blog

Once you have confirmed eSIM support with your carrier, they will provide you with an activation code or a QR code. This information is essential for setting up the eSIM on your device. It may be sent to you via email, SMS, or through your carrier’s online portal.

Step 4: Access eSIM settings

On your device, navigate to the settings menu and look for the section related to cellular or mobile network settings. Within this section, you should find an option for setting up eSIM. The location of this option can vary depending on your device and operating system (iOS, Android).

Step 5: Enter activation details

Input the activation code or scan the QR code provided by your carrier. Follow the on-screen instructions to complete the eSIM setup process. Your device will establish a connection with the carrier’s network, and once the process is complete, you should be able to use your device with the eSIM.

Step 6: Complete activation

Once you have entered the necessary information, your device will communicate with your carrier to activate the eSIM. This process might take a few minutes. You may be prompted to restart your device to complete the activation.

Step 7: Verify setup

Check your Cellular or Mobile Data settings to ensure the eSIM is listed and active. If you have multiple cellular plans (a physical SIM and an eSIM), you can choose which one to use for calls, data, and text messages.

Wrap up

Can I get an eSIM without a physical SIM? Definitely! To sum it up, the switch to eSIM-only on my new iPhone has been a breeze. The answer to whether you can get an eSIM without a physical SIM is a definite yes. This change marks a big step in how we connect our phones. No more tiny plastic cards – eSIMs are the new way forward.

Don’t leave without sharing your experiences with a comment. Thanks for reading!

Airtel eSIM activation: How to activate eSIM on Airtel

Step-by-step guide for Airtel eSIM activation

As the world enters the era of digital technology, carriers such as Airtel are rapidly adapting to this new landscape by harnessing the capabilities of eSIMs to revolutionize the customer experience. For those unfamiliar, an eSIM, or Embedded Subscriber Identity Module, serves as an electronic substitute for the traditional physical SIM card. In this article, we will delve into the realm of Airtel eSIM activation, specifically utilizing QR codes, and explore how this ingenious approach streamlines and simplifies the activation process. By adopting this innovative method, Airtel ensures that its customers can seamlessly transition to the digital realm with minimal hassle and maximum convenience.

Activate eSIM on Airtel on your smartphone

The full instructions for your Airtel eSIM activation are as follows: 

Step 1: Start the eSIM card request process.

  • Install the Airtel Thanks app, then sign in with the phone number you want to convert to an eSIM.
  • Navigate to “shortcuts” by scrolling down from the “Home” page.
  • To start the eSIM request, click the “upgrade to eSIM” icon.
  • Depending on your choices, choose “this device” or “another device” to use.
  • For the same device, enter your 32-digit EID number (for further information, see FAQ).

Step 2: Use your registered phone number to confirm the OTP.

  • Enter the OTP you received on the Airtel phone you registered.
  • Your Airtel eSIM request has been received and is prepared for configuration.
How can I set up my Apple iPhone's Airtel eSIM?
How can I set up my Apple iPhone’s Airtel eSIM? Credit: Hidden Valley

Step 3: Set up your eSIM

  • Now, you must download the eSIM by following your smartphone’s instructions.
  • Once you’ve converted from a physical SIM to an eSIM, remove the old SIM card, activate the new eSIM profile, and restart your device.

How can I set up my Apple iPhone’s Airtel eSIM?

Use the following steps to set up your iPhone’s Airtel eSIM:

  • Link your iPhone to a Wi-Fi or data network.
  • Get the Notifications Panel open.
  • To complete setting up mobile service notifications, click Finish.
  • Choose Continue and adhere to the instructions.

How can I set up my Google Pixel phone to use an Airtel eSIM?

First, confirm that your request for an Airtel eSIM activation has already been sent in. Proceed with these steps now:

  • Link your device to Wi-Fi or a data network. Go to Settings > Network & Internet. Toggle the addition (+) symbol next to the mobile network.
  • Select “Download a SIM.”
  • To activate your Airtel eSIM, follow the on-screen instructions.

How can I set up my Samsung phone to use Airtel eSIM?

First, confirm that you have already used the Airtel Thanks app to submit an Airtel eSIM activation request.

Now, to configure your Samsung smartphone’s Airtel eSIM, follow these steps:

  • Link your Samsung smartphone to Wi-Fi or a data network.
  • Go to Settings > Connections > SIM Manager > Add eSIM and proceed.

How can I set up my Motorola phone to use an Airtel eSIM?

First, confirm that your request for an Airtel eSIM activation has already been sent in. Proceed with these steps now:

  • Link your device to Wi-Fi or a data network. 
  • Open Settings > Network & Internet > Click on the plus (+) sign next to mobile network.
  • Select “Download a SIM.”
  • To activate your Airtel eSIM, follow the on-screen instructions.

How can I set up my Vivo phone’s Airtel eSIM?

In terms of Airtel eSIM card activation, Vivo phones are used. The steps are as follows:

  • Link your device to Wi-Fi or a data network. 
  • Go to Settings > Network & Internet. 
  • Select “SIM card and mobile network.”
  • After tapping on eSIM, select “+ Add eSIM.”
  • After selecting “eSIM card,” press “Add.”
  • To activate your Airtel eSIM, follow the on-screen instructions.

Important notes:

  1. After you start the conversion to an eSIM procedure, please make sure you finish all the stages.
  2. Refrain from selecting the “delete” option in the eSIM settings since this may erase the eSIM from your phone, preventing you from using mobile data, making calls, or using other features.
  3. After the eSIM request is completed, all SMS services, including outgoing and incoming ones, will be blocked for a full day.
  4. After converting from a physical SIM to an eSIM, restart your device, take out the physical SIM, and activate the new eSIM profile.
  5. Never give out your EID to anybody as this might result in unauthorized access to your phone number.
  6. For assistance, please visit the closest Airtel Store if your eSIM-activated device is misplaced.
  7. In case you wish to get a new Airtel ESIM connection, please visit the nearest Airtel Store.

Activate eSIM on Airtel on your Apple smartWatch

Step 1: 

  1. On your iPhone, launch the Watch app.
  2. Begin the Apple Watch and iPhone pairing procedure.
  3. Read the terms and conditions before Submit to continue.

Step 2: 

  1. To proceed, log in using your Apple ID and password.
  2. On your Apple Watch, tap “Create a Passcode” to generate a four-digit passcode.

Step 3: 

To connect your Airtel Postpaid number and plan with your Apple Watch, tap “Setup Mobile Data.”

Activate eSIM on Airtel on your Apple SmartWatch
Activate eSIM on Airtel on your Apple SmartWatch. Credit: Airtel

Step 4: 

  1. Read the terms and conditions before continuing.
  2. To enable wireless service on your Apple Watch, tap “Continue.”
  3. Type in your self-care password and Airtel postpaid number. 

(Note: If you aren’t registered, click Unable to log in to register your phone number).

Step 5: 

Examine the specifics of your plan, then click “Sign Up” to begin the setup process.

Step 6: 

  1. After the subscription is successful, tap Close.
  2. Kindly allow a minimum of 10 minutes for your Airtel postpaid number and plan to be shared with your Apple Watch.

Step 7: 

Please be patient while your Apple Watch and iPhone fully sync.

Activate eSIM on Airtel on your Samsung gear watch

Step 1:

  1. Open the Play Store and download Galaxy Wearable.
  2. On your phone, tap the Galaxy Wearable icon.
  3. Select “Start the Journey.”
  4. Select the Galaxy Wearable as your device.

Step 2: 

  1. Press the Connect button.
  2. Connect it to your phone.
  3. Give your watch permission to access your phone.
Activate eSIM on Airtel on your Samsung Gear Watch
Activate eSIM on Airtel on your Samsung Gear Watch. Credit: Airtel

Step 3: 

  1. Examine the shared option first.
  2. Open a Samsung account or log in.
  3. Access your Samsung account.

Step 4: 

  1. Click next after logging in successfully.
  2. Select Check for backup in order to recover your watch from backups.
  3. Select Skip for the time being if there isn’t a backup.

Step 5:

  1. Select a SIM card for your cell provider.
  2. Select Next to configure your mobile network.
  3. Agree to the Airtel Terms and Conditions.

Step 6:

  1. Choose your circle and press continue.
  2. Check the specifics of your plan and select Sign Up.
  3. Establish an Airtel watch connection.

FAQs

1. Does Airtel support eSIM?

Yes, Airtel does support eSIM technology, allowing users to activate plans using an eSIM.

2. How long does it take to activate eSIM on Airtel?

The eSIM activation process takes about two hours to complete after the Airtel eSIM setup is finished. On the other hand, you can utilize Airtel services throughout the activation time provided you have a real Airtel SIM card.

eSIM technology has become much more popular as many models from Apple, Samsung, and other well-known firms support it. Because these SIM cards are built into the phones, the user has even more security and versatility.

3. How to get an Airtel eSIM QR code?

Airtel provides the eSIM QR code either through their website or by contacting their customer service.

4. Why is my Airtel eSIM stuck on activating?

Activation issues may arise due to incorrect details input, device compatibility problems, or network connectivity issues. Verify information and contact Airtel support for assistance if needed.

Wrap Up

Airtel eSIM activation is a hassle-free procedure that can be easily done on your device by following a few simple steps. To ensure a smooth activation and make the most of the benefits offered by a digital SIM card, it is essential to verify compatibility and ensure accurate information input. 

If you need any assistance or have inquiries regarding the activation process of your smartphone’s eSIM, please feel free to reach out to us.

Straight Talk eSIM activation: A complete guide for beginners

Step-by-step guide for Straight Talk eSIM activation

Unlock the potential of your device with hassle-free Straight Talk eSIM activation. Whether you’re adding a new line to your account or switching devices on an existing line, mastering the activation process is key.

Dive into our comprehensive instructions to unleash the full potential of your device on our reliable network. Don’t let the activation process be a barrier – empower yourself with the knowledge you need. 

Join us in embracing the benefits of hassle-free digital connectivity with Straight Talk!

How to Activate eSIM on Straight Talk

Getting started with the activation of an eSIM through Straight Talk is a hassle-free process, involving a few simple steps that ensure a smooth transition. As you embark on this journey, rely on below exhaustive steps below to provide you with comprehensive assistance during the activation process:

Step 1: Device compatibility check

Check to see whether your phone is Straight Talk eSIM compatible. For this information, visit the Straight Talk website or get in touch with their customer service. As not all phones enable eSIM, compatibility must be confirmed. 

For a list of phones that support eSIM technology, go here as well.

Step 2: Purchase an eSIM activation kit

Obtain a Straight Talk eSIM activation kit. You can buy this kit online or from selected retail stores. The activation kit will include a QR code necessary for activating your eSIM.

How to activate eSIM on Straight Talk
How to activate eSIM on Straight Talk. Credit: Straight Talk Blog

Step 3: Acquire Activation Details

For detailed eSIM activation instructions relevant to your device and plan, please reach out to Straight Talk’s customer support or visit their official website.

Step 4: Access eSIM Settings

To activate your eSIM, go to https://support.straighttalk.com/en/ and follow the instructions:

Straight Talk eSIM activation
Straight Talk eSIM activation. Credit: Clark Howard

Step 1: Access your phone’s settings

Step 2: Navigate to “Cellular” or “Mobile Data.”

Step 3: Choose “Add Cellular Plan” or “Add Data Plan” 

Step 4: Follow the instructions to scan the QR code provided in your activation kit.

Step 5: Scan QR Code or enter information

To incorporate the eSIM profile, you have two options: manually input the activation data or leverage your device’s camera to scan the provided QR code from Straight Talk.

Step 6: Follow activation instructions

To successfully complete the activation process, kindly adhere to the instructions displayed on your device.

Step 7: Confirmation of activation

Once your Straight Talk eSIM is successfully activated and verified, you will have the convenience of utilizing cellular data, making calls, and sending texts, all within the coverage of your Straight Talk plan.

Remember: For a smooth transition to eSIM, it is crucial to ensure compatibility and support from both your phone and carrier as not all plans and carriers offer eSIM functionality. It is therefore advisable to verify beforehand whether your phone and carrier support this technology.

1. By making a call from a different phone to our Customer Care Center, you can also activate your new Straight Talk phone.

It is necessary that you prepare the following:

  • Your activation card’s IMEI, MEID, or serial number.
  • The SIM card you have.
  • Your phone, with a minimum of 50% charged battery.

Click the button below if you don’t already have a phone number, and our automated helper, STAR, will walk you through the activation procedure.

2. Remember that the following will be required when the activation occurs.

  • The Digital SIM IMEI of your phone.
    • Please supply the Digital SIM IMEI or IMEI2 if you own an iPhone 15.
    • Please supply the Digital SIM IMEI or IMEI2 if you own an iPhone 14.
    • The Digital IMEI2 should be provided if you own an iPhone 12.
    • Give your Digital IMEI2 if you have an eSIM-capable SE or an iPhone 13 with the Straight Talk brand.
    • Give the Digital IMEI or IMEI2 if you are bringing your own iPhone 13 or SE.
  • Your phone, with a 50% or higher battery life; data connection (Wi-Fi or cellular via the physical SIM card or accessible IMEI on the phone). 
  • If Wi-Fi isn’t available and you have an iPhone 14 or iPhone 15, you can proceed without it if requested.

See the comprehensive eSIM FAQs area for answers to other eSIM-related queries.

FAQs

1. Does Straight Talk support eSIM?

Yes, Straight Talk offers support for eSIM technology, granting users the capability to activate their plans by utilizing an eSIM.

2. How long does it take to activate eSIM on Straight Talk?

In general, the activation process usually requires just a few minutes. Nevertheless, the actual duration may differ depending on network conditions and device compatibility.

3. How to get a Straight Talk eSIM QR code?

To obtain the eSIM QR code from Straight Talk, customers can easily access it via their official website or by simply contacting their dedicated customer service representatives.

Wrap Up

Experience a realm of effortless digital connectivity by joining Straight Talk, where eSIM activation serves as both a technological advancement and an entryway to unmatched convenience. As you venture into this path, equipped with our comprehensive guide on Straight Talk eSIM activation and enriched by the insights presented in frequently asked questions, you enable yourself to fully harness the immense possibilities of this cutting-edge innovation.

Share the convenience of hassle-free connectivity with your friends and family—click to activate now and spread the word! Your journey into the seamless world of digital connectivity begins here. Don’t miss out—activate and share the innovation!

How to set up eSIM on an iPhone in 5 minutes?

How to set up eSIM on an iPhone in 5 minutes

It has never been simpler to set up an eSIM on your iPhone, and with our comprehensive instructions, you can do it in just five minutes. Our expert-level tutorial streamlines the procedure so you can easily activate and utilise eSIM on your iPhone 14. You can take use of all the features of eSIM, including the ease of managing several phone numbers without a real SIM card, by following our tutorial. Embrace the future of digital connectivity and wave goodbye to the inconvenience of constantly changing SIM cards.

Before setting up eSIM on iPhone

Step 1: Log in to your eSIM account

Ensure you have your login credentials ready. Access your eSIM account using your preferred device.

Step 2: Navigate to “My eSIMs”

Once logged in, locate the “My eSIMs” section. This is typically where you manage and view your active eSIMs.

Step 3: Identify your desired eSIM

Scroll through the list of eSIMs until you find the one you wish to install. Click on the “Details” button associated with that specific eSIM.

Step 4: Initiate the installation process

Within the eSIM details, look for the “Install eSIM/Access Data” option and tap on it to start the installation process.

Step 5: Access the manual settings

Navigate to the “Manual” tab located at the top of the screen. Here, you’ll find crucial information such as the SM-DP+ Address and Activation code. Make sure to note down these details or keep the page open for future reference during the installation.

How to set up eSIM on an iPhone

Set up eSIM on iPhone manually

Step 1: Access your device settings

Open the settings menu on your device. This is typically represented by a gear icon.

Step 2: Locate the Cellular or Mobile settings

Within the settings menu, find and tap on “Cellular” or “Mobile.” This is where you manage your mobile connectivity options.

Step 3: Add a new Cellular Plan

Look for the option “Add Cellular Plan” or “Add Mobile Data Plan” and tap on it to initiate the setup process.

Step 4: Enter details manually

Choose “Enter Details Manually” and input the SM-DP+ Address and Activation Code provided by your eSIM service.

Step 5: Enter the Confirmation Code

If applicable, enter the Confirmation Code from your Airalo account. This may be required to validate and activate your eSIM.

Step 6: Label your eSIM

Create a label or choose from available options to distinguish your new eSIM. This label will help you easily identify and manage your connections.

Step 7: Set default preferences

Under the Default Line page, select your eSIM for cellular data only. This ensures that your device prioritizes using the eSIM for mobile data.

Step 8: Confirm the setup

After completing the above steps, your new eSIM should now be visible under your Cellular Data or Mobile Data Plans. Confirm the setup to enjoy the benefits of your newly added eSIM seamlessly integrated into your device.

Set up eSIM on iPhone by QR code

Step 1: Access your device settings

Open the settings menu on your device by locating and tapping the gear icon.

Step 2: Navigate to Cellular or Mobile settings

Within the settings menu, tap on “Cellular” or “Mobile.” This is where you manage your mobile connectivity options.

Step 3: Add a new Cellular Plan

Find and tap on “Add Cellular Plan” or “Add Mobile Data Plan” to initiate the eSIM setup process.

Step 4: Scan your eSIM QR code

Use a printed QR code or another device displaying the QR code to scan your eSIM QR code. This ensures a quick and accurate setup.

Step 5: Enter the 4-digit confirmation code

If prompted, enter the 4-digit confirmation code provided with your eSIM. This step may be necessary to authenticate and activate your eSIM.

Step 6: Label your eSIM

Create a label or choose from existing options to easily identify your eSIM. This label will help you manage and differentiate your mobile plans effectively.

Step 7: Set default preferences

Under the Default Line page, select your eSIM for cellular data only. This ensures that your device prioritizes using the eSIM for mobile data.

Step 8: Confirm the setup

After completing the steps above, your new eSIM should now be visible under your Cellular Data or Mobile Data Plans. Confirm the setup to enjoy the benefits of seamless integration and enhanced connectivity.

Set up eSIM on iPhone by accessing data 

The method of configuring eSIM on your iPhone is easy to understand. You’ll be set to go in no time if you just follow these simple steps:

Step 1: Access Cellular or Mobile Settings

Navigate to Settings on your device and select either “Cellular” or “Mobile.”

Step 2: Tap on your eSIM plan

Locate your newly installed eSIM plan within the Cellular or Mobile settings and tap on it.

Step 3: Enable eSIM and Data Roaming

Toggle the “TURN ON THIS LINE” option for your eSIM. Additionally, ensure Data Roaming is enabled for seamless connectivity.

Step 4: Configure Cellular Data Network Settings

On the same page, tap on “Cellular Data Network” or “Mobile Data Network.” If required, enter the APN (access point name) provided in the eSIM installation details from your Airalo app/account.

Step 5: Return to Cellular or Mobile Settings

Navigate back to Settings and select “Cellular” or “Mobile.”

Step 6: Set eSIM as Default for Data

Select your eSIM for Cellular Data or Mobile Data. To avoid charges on your other line, ensure “Allow Cellular Data Switching” is turned off.

Step 7: Choose the Supported Network

Go to your eSIM settings and select the supported network for optimal performance.

Well done on successfully setting up and turning on your iPhone’s eSIM! Now that you have many cellular plans on one device, you may enjoy the amazing ease and flexibility they bring. With this new option, you can easily switch between plans and customize your smartphone usage to meet both your personal and business needs, opening up a world of possibilities.

FAQs

Frequently asked questions about configuring iPhone eSIM. Credit: Canva

1. How long does it take to set up eSIM on an iPhone?

It just takes 5 minutes to set up an eSIM on an iPhone; the process is simple and quick. To activate the eSIM, you must first get the eSIM QR code, also known as the SM-DP+ and activation code, and then follow the easy instructions. The eSIM functions just like a traditional SIM card once it is configured.

2. How do I get a 19-digit eSIM number on my iPhone?

Step 1: Contact the network provider

The 19-digit eSIM number required to activate eSIM on your iPhone can be obtained by contacting your network provider.

Step 2: Receive eSIM QR code

The 19-digit eSIM number will be sent to you by your network provider as an eSIM QR code. The setup instructions and data needed to activate the eSIM are all contained in this code.

Step 3: Use your iPhone camera

Scan the eSIM QR code with your iPhone’s camera. There is no longer a need to input lengthy codes thanks to this efficient technique manually.

Step 4: Follow the instructions on the screen

Once the eSIM QR code has been scanned, proceed with the on-screen directions displayed on your iPhone. eSIM QR codes make the activation procedure more precise and efficient by removing the need for tedious human code entering.

Step 5: Complete activation

To finish the activation procedure, keep on according to the directions displayed on the screen. The eSIM QR code streamlines the procedure, enabling consumers to conveniently enjoy the advantages of having an integrated digital SIM card in their iPhones.

You may quickly and simply activate the eSIM by scanning its QR code, which improves user experience overall and does away with the inconveniences of using more conventional code-entering techniques. If this step-by-step tutorial was useful to you, please think about forwarding it to others who might find it useful.

3. How do I find my eSIM IMEI number on an iPhone?

Use these procedures to locate the eSIM IMEI number on your iPhone:

Step 1: Launch the iPhone’s Settings app.

Step 2: Press “General” and then choose “About.”

Step 3: Look for the “IMEI” section by scrolling down. There is a listing for the eSIM IMEI number.

Wrap up

It’s now simpler than ever to set up a cellular plan on your iPhone thanks to eSIM technology. You may enjoy the ease of having numerous cellular plans on a single smartphone by activating your eSIM in only five minutes. With eSIM, bid adieu to traditional SIM cards and welcome the future of mobile connection. Experience the flexibility and freedom it offers by giving it a try now. 

If you thought this tutorial was useful, please like, share, and comment. Give others the knowledge they need to activate their eSIMs without any problem!

Mint Mobile eSIM activation: How to activate eSIM on Mint Mobile

Mint Mobile eSIM activation

Are you ready for the convenience of eSIM technology on Mint Mobile? In this article, we’ll guide you through the Mint Mobile eSIM activation process, making it easy for you to unlock the potential of your mobile experience. Discover the simple steps that make activating an eSIM on Mint Mobile a breeze, keeping you connected with speed and flexibility. 

Whether you’re new to Mint Mobile or an existing customer planning to switch to eSIM, you can trust that Mint Mobile fully supports eSIM activation on compatible devices. This makes sure that you can enjoy the benefits of eSIM technology without having to switch to another service provider.

How to activate eSIM on Mint Mobile

There are two methods to activate eSIM on Mint Mobile: through the Mint Mobile app and on the Mint Mobile website. Choose the one that suits you best for a smooth and hassle-free eSIM activation experience.

How to activate eSIM on Mint Mobile
Activate your eSIM on Mint Mobile through either the app or the website. Source: youtube.com

Activate Mint Mobile eSIM through app

Activating your eSIM on Mint Mobile through the app is the simplest and most user-friendly method. Before you begin, make sure your device is eSIM compatible by checking Mint’s website. Also, ensure your phone is fully charged and connected to Wi-Fi for smooth activation. If you’re switching from another service provider, have your old account information ready, including the number and PIN for a hassle-free Mint Mobile eSIM activation.

Follow these step-by-step instructions:

Step 1: Access the Mint Mobile app

Begin by locating and opening the Mint Mobile app on your Android or iPhone device.

Step 2: Begin the activation process

Look for the specifically labeled option reading “Activate your SIM card” within the app interface. Tap on this option to kickstart the activation process.

Step 3: Automatic device compatibility check

The app will conduct an automatic check to verify your device’s compatibility with eSIM technology. If successful, proceed to the next step.

Step 4: Follow on-screen instructions

Follow the on-screen instructions to complete the setup. Mint Mobile guarantees that the process will only take a few minutes, but you should allow an hour to account for any unforeseen delays.

Activate Mint Mobile eSIM on  website

Activating your Mint Mobile eSIM on the website is a convenient option, especially if you’ve recently purchased a Mint Mobile plan online and are eager to kickstart your mobile experience promptly. You have the choice to receive an email link for activation later, but assuming you’re ready to proceed immediately, follow these steps for a seamless Mint Mobile eSIM activation experience:

Activate Mint Mobile eSIM on website
Opting for eSIM activation on the Mint Mobile website offers convenience. Source: androidauthority.com

Step 1: Complete Mint plan purchase

After successfully purchasing your Mint plan and reaching the order confirmation page, locate and click on the prominently displayed “Activate Now” button.

Step 2: Scan the QR code

Use your smartphone to scan the provided QR code. For most devices, open the Camera app and tap on the link that appears in the viewfinder. Note: Android users may need to check and enable QR scanning in their camera settings.

Step 3: Begin activation process

The activation process will begin automatically. If your phone appears stuck on the “Cellular Plan” screen after scanning the QR code, close the associated window on your device and attempt to scan the code again.

As a backup, the QR code is also included in the confirmation email. If you can’t find the email, be sure to check your trash or spam folders. This straightforward process ensures a quick and efficient Mint Mobile eSIM activation directly from the website.

If you need further assistance, call Mint Mobile at (800) 683-7392.

FAQs

1. Does Mint Mobile support eSIM?

Yes, Mint Mobile supports eSIM. You can activate your eSIM online or through the Mint Mobile app, making the process convenient and efficient. Mint Mobile service can be activated via eSIM on compatible phones, and you can check your phone’s compatibility through the Mint Mobile app. If you’re switching from a physical SIM to an eSIM, the Mint Mobile app offers an easy activation process.

2. How long does it take to activate eSIM on Mint Mobile?

To activate your eSIM on Mint Mobile, open the app and select “Activate your SIM card”. The app will automatically check your phone’s compatibility and install the eSIM within minutes. In addition, you can activate your eSIM on the Mint Mobile website or through the confirmation email received after purchase.

3. Does Mint Mobile activate immediately?

Mint Mobile typically allows users 45 days to activate their SIM card after receiving it. Activation is quick and can be done, taking only a few minutes. If you wish to activate your plan immediately after purchase, click “Activate Now” on the order confirmation page.

Wrap up

As eSIM technology becomes increasingly prominent in the mobile industry, it is important for users to understand its benefits. Mint Mobile’s user-friendly eSIM activation process eliminates the need for a physical SIM card, giving users enhanced flexibility in managing their mobile service.

This demonstrates Mint Mobile’s dedication to providing excellent service by applying technology and simplifying the user experience. So, why wait? Take advantage of Mint Mobile eSIM activation for unparalleled convenience and flexibility in your mobile connectivity.

The best eSIM app for your journey in 2024

Today, with the popularity of eSIM, more and more eSIM apps appear. Among dozens of eSIM apps, do you really need the best eSIM app? I have some great suggestions for you in this article! Why? To me, limiting yourself to one eSIM app is like only flying with one airline. This is not really optimal for someone who loves to travel and experience like me. In fact, I have tried a lot of eSIM apps from Airola, Nomad, Holafy to less famous names. 

Now it’s time to get into the details about the perfect eSIM apps to help you have a smooth journey! Uhm, it’s hard to know which app best suits your needs. Compare all the options so you can choose the best one!

The 7 best eSIM apps for your journey

For most travelers, there are definitely some benefits to getting an eSIM, and I recommend trying out an eSIM app if you’ve never used an eSIM app before. That’s what I did – and I haven’t regretted my choice. I tried a few different carriers to know which was the best eSIM app for your journey. 

veteranmax 

As a frequent traveler, staying connected is always a top concern. I’ve experimented with various global and local eSIM cards across different countries, yet the inconvenience of purchasing and swapping them became quite draining. That’s why we created veteranmax – an innovative platform providing eSIMs designed for travelers. I have to admit, it completely transformed how I stay connected on my journeys.

Something we are proud of: 

  • User-friendly app: veteranmax stands out as an exceptional solution. We take the user as the center and simplify the whole process. In other words, veteranmax serves as a comprehensive and user-friendly platform, offering a hassle-free experience for individuals looking to engage with eSIM technology.
  • Smart design: veteranmax boasts an app designed for seamless navigation and swift eSIM activation within minutes. Unlike conventional processes, veteranmax eliminates the need to manually select your country. Instead, simply opt for your preferred data size, granting you immediate access across a vast network spanning over 150 countries and beyond.
  • Affordable price: veteranmax stands out among competitors by providing a range of meticulously crafted data plans, ensuring affordability without compromising quality. Our commitment to transparency means zero hidden fees, offering a seamless experience ideal for travelers mindful of their budgets. 

We are improving:

  • As a newcomer, it might face initial skepticism from users due to a lack of established reputation. However, veteranmax is trying to build trust and become the best eSIM app in the near future.

veteranmax has emerged as the ultimate solution for travelers looking for uninterrupted connectivity without financial constraints during their global travels. With the own path, veteranmax app will always be the ideal companion for travelers around the world.

Airalo

Within the Airalo app, you can explore eSIM options across over 190 countries. Credit Image: tandysinclair

I’ve been utilizing the Airalo App for a while, and the process of buying, managing, and monitoring eSIM packages has been remarkably hassle-free. It is an application used and widely recognized by many travelers! Within the Airalo app, you can explore eSIM options across over 190 countries. What’s convenient is that upon purchasing an eSIM through this platform, eSIM activation on your phone is simplified.

What I like: 

  • Flexibility plans: What stands out for me about Airalo is its remarkable flexibility. It allows you to select from a range of data plans tailored to your specific requirements, whether it’s a brief journey or an extended stay. 
  • eSIMs linked to the speediest local networks: Within minutes of installing the eSIM on my smartphone, I connected to the local network. The internet speed and reliability have been consistent throughout my travels, enabling me to stay in touch, manage emails, and stream videos seamlessly.
  • User-friendly, intuitive application interface: Airalo has developed an impressively intuitive app, simplifying the exploration of their comprehensive collection of eSIMs spanning across 190+ countries. The purchase process for an eSIM is seamless, accompanied by straightforward and easily understandable setup instructions.

What I don’t like: 

  • Absence of live chat support: This absence might lead to frustration or delays in addressing user queries or problems, affecting overall customer satisfaction.
  • Lacks family plan options for data sharing: This absence limits the app’s appeal to users seeking such bundled options, potentially causing them to explore alternative services that cater to group data sharing.

I used Airalo before, it’s a bit more expensive but the local plans are great if you’re moving around several countries on a longer trip. In essence, Airalo has revolutionized my connectivity while traveling, offering a straightforward solution. I wholeheartedly recommend it to anyone seeking a reliable, convenient stay connected while exploring the globe.

Flexiroam

Flexiroam emerges as a robust and dynamic eSIM app. Credit Image: esims.com

Flexiroam emerges as a robust and dynamic eSIM app, offering an extensive array of eSIM data plans that cover approximately 150 countries globally, with continual expansion underway. 

What I like: 

  • Solid eSIM service:  Through their dedicated eSIM applications available on both iPhone and Android platforms, you gain access to an extensive inventory of data plans. With plans varying in data volume and duration, there’s typically a wide range available, ensuring you can easily discover an eSIM plan perfectly aligned with your specific data requirements and the duration of your trip.
  • Flexible payment methods: encompassing credit cards, PayPal, and Google Pay. This flexibility in payment methods not only enhances user convenience but also reflects the app’s adaptability in catering to the evolving preferences of its global user base.

What I don’t like:

  • User interface: While the app aims for simplicity, some users might find the user interface less intuitive or slightly complex to navigate, especially when compared to other similar apps in the market.
  • Non-refundable transaction: Flexiroam’s eSIM purchases are non-refundable. Once bought, there are no refunds for cancellations or changes of mind. This policy emphasizes the need for careful consideration before making a purchase, as there’s no flexibility for refunds, even in case of unexpected travel alterations or mistaken purchases.

Flexiroam offers stable network speeds but to me, it is unnecessarily overpriced. There are other eSIM apps that are just as good and convenient, bringing more value to my budget. Therefore, I really do not rate this app highly. If you value transmission stability, it could be the perfect choice! Overall, while the Flexiroam app offers convenient international roaming solutions, these potential drawbacks might impact certain users’ experiences based on their specific needs and preferences.

Holafly

Holafly stands firmly among the top global eSIM applications, as one of the best eSIM apps in the market. Holafly distinguishes itself not only through its comprehensive global coverage but also via its exceptional customer support and competitive pricing structure.

What I like:

  • Good network coverage: With the expansive network spanning across 180 countries, Holafly guarantees uninterrupted connectivity regardless of your location. Whether navigating bustling cities or exploring remote landscapes, this extensive network ensures your connectivity needs are met, fostering a hassle-free experience during your travels.
  • Availability of unlimited data plans: Holafly app includes unlimited data options across a majority of their destinations. This feature of Holafly is an ideal solution for individuals who heavily rely on data during their travels, ensuring uninterrupted connectivity and unrestricted usage across diverse locations covered by their service.

What I don’t like:

  • Tethering limitations: Some plans might not support tethering, restricting the ability to share the internet connection with other devices.
  • App performance: Occasionally, users might encounter app performance issues, such as occasional glitches or slow responsiveness, affecting the overall user experience.

Since appearing on the market, Holafly has received a lot of attention, and I do not deny that it is one of the best eSIM applications today. With its flexibility, convenience and excellent service, Holafly can be an indispensable partner for your travels. Experience it and share with me your feelings!

Nomad 

The Nomad app streamlines the process of managing your eSIM. Credit Image: esims.com

Using the Nomad eSim app, you can explore data plans available across their supported destinations, spanning over 100 countries globally. They typically offer around four diverse data plans. The Nomad app streamlines the process of purchasing, activating, and managing your eSIM. What’s more, it facilitates these tasks seamlessly across multiple devices, enhancing convenience and accessibility.

What I like:

  • Stable Internet: The Nomad app is designed to ensure stable internet for users on the move. It likely offers features to locate reliable Wi-Fi spots, co-working spaces, or community-recommended places for consistent connectivity in various locations. 
  • A good range of eSIM plans: Nomad app presents an extensive and versatile range of eSIM plans tailored to cater to a multitude of preferences and requirements. It ensures that users have ample choices suiting their specific data needs, duration of stay, or preferred regions of travel. 
  • Innovative point accumulation system: Nomad app introduces a rewarding loyalty points system, granting users the opportunity to accrue points over time, offering the flexibility to exchange them for various data plans at a later time. This is a Nomad’s demonstration of enhancing user experience

What I don’t like:

  • Not compatible with eSIMs in every country: While Nomad offers extensive coverage, there might be occasional restrictions or variability in connectivity in certain remote or less-covered areas.
  • eSIM data plans tend to be pricier compared to other options: For those with a limited budget, calculate carefully and use other alternative apps with similar functions.

Omg, Nomad has almost everything I need, but its price seems a lot higher than my budget. Anyway, I think this is one of the best eSIM apps out there. You should try and decide whether to use it for life or not?

Airhub 

The Airhub app is considered as an exceptional tool. Credit Image: twoticketsanywhere

The Airhub app is an exceptional tool designed to streamline the eSIM experience for users. With a focus on simplicity and intuitiveness, the app empowers users to explore and manage a diverse range of eSIM plans tailored for global travel.

What I like:

  • Impressive service plans: Unlike the conventional 3-5 plan offerings commonly found among other eSIM providers for a single country, Airhub sets itself apart by offering an extensive selection of up to 15 plans. 
  • Local company partnership for affordable rates: Partnering with local companies can be a strategic move for veteranmax to offer more affordable rates to its users. Collaborating with local telecom providers or businesses in various regions can help veteranmax negotiate better rates for data plans or services. 
  • Intuitive design: The Airhub App has an elegant and intuitive design, ensuring a seamless experience. Accordingly, it enhances usability and makes the entire experience more engaging and enjoyable for the user.

What I don’t like:

  • Limitations: Despite its strengths, the app might have limitations such as occasional tethering restrictions within certain plans, variability in coverage in remote areas, and occasional performance hiccups that can affect the overall user experience.

After using Airhub for a while, I found it relatively okay, not great. It can bring many advantages to travelers looking for the right eSIM solution, because it offers many plan options, and at the same time, the process of purchasing and managing eSIM for global connectivity is relatively simple. .

AloSIM

AloSIM is accessible in over 170 countries, providing cost-effective data packages designed for your travel needs. This eSIM service not only offers affordable data but also enables hotspot and tethering functionalities, allowing you to share your mobile data with others. Setting up the eSIM through the free app is straightforward and hassle-free.

What I like:

  • Hotspot and tethering capabilities: AloSIM’s hotspot and tethering features make it easy to share mobile data with others. Whether creating a Wi-Fi hotspot for multiple devices or sharing via USB/Bluetooth, it offers flexibility for diverse connectivity needs, enhancing its overall usefulness for users.
  • User-friendly setup: The AloSIM app simplifies eSIM installation with a user-friendly interface. Users can log in, scan a QR code, choose a data package, and activate the eSIM effortlessly. The app’s step-by-step guidance ensures a seamless setup without the complexities of traditional SIM cards. Overall, it offers a hassle-free experience for setting up mobile connectivity while traveling.

What I don’t like: 

  • Speed variability: The speed of the data connection can vary depending on the location, network congestion, or specific conditions, potentially leading to slower-than-expected performance.
  • Customer support: Some users have reported issues with customer support, experiencing delays or challenges in resolving queries or technical issues.

AloSIM may have its limitations, however, to me, this is a usable app. Because not all eSIM apps allow connection sharing. But, I want to share an unlimited network with others. AloSIM allows me to do this easily.  It’s essential to consider that user experiences can vary based on individual preferences, locations, and device compatibility. You should evaluate the pros and cons before downloading it!

Here’s a concise summary of our findings:

  • Best eSIM app for flexible plans: Airalo
  • Best eSIM app for solid eSIM service: Flexiroam
  • Best eSIM app for good coverage: Holafly
  • Best eSIM app for easy use with affordable prices: veteranmax 
  • Best eSIM app for stable Internet: Nomad 
  • Best eSIM app for local company partnership for affordable rates: Airhub 
  • Best eSIM app for hotspot and tethering capabilities: AloSIM

How to choose an eSIM app for your journey

To select the best eSIM app for your travel involves a few crucial ways:

Destination coverage

Check the eSIM app’s coverage in the regions you plan to visit. Ensure they offer reliable network coverage in your intended destinations.

Data plans with affordable pricing

Compare data plans among different eSIM apps. Look for plans that suit your data needs for the duration of your trip, considering data allowances, validity periods, and costs.

User reviews and ratings

Research user reviews and ratings of various eSIM providers to gauge the reliability, customer service, and overall satisfaction of their services.

Ease of use and convenience

Opt for an eSIM provider or app that offers a user-friendly interface, simple purchasing process, and easy activation steps. Consider how straightforward it is to manage the eSIM while traveling.

By focusing on destination coverage, suitable user feedback, and ease of use, you can narrow down the best eSIM provider that aligns with your travel needs and ensures a seamless connectivity experience during your journey.

Wrap up

When starting a new journey, having a good eSIM app can make your experience easier and more flexible than ever. Above is a list of the best eSIM apps that are popular. With our suggestions, with the pros and cons we give, have you found the app that suits your needs? If you’re still hesitant, try veteranmax’s products. A hundred hearings are not as good as one try. We believe you can only exclaim satisfaction!

Simple Mobile eSIM activation: A Quick Guide For Beginners

Simple Mobile eSIM activation: How to activate eSIM on Simple Mobile

In today’s digital age, the flexibility and convenience offered by eSIM technology have become increasingly popular. Simple Mobile, a trusted name in the mobile service industry, has joined the ranks of carriers adopting this advanced feature. 

In this article, we’ll walk you through the process of Simple Mobile eSIM activation, answer frequently asked questions, and troubleshoot any potential issues you might encounter. Let’s start!

How to activate eSIM on Simple Mobile

In the US, Simple Mobile, a mobile virtual network operator (MVNO), does not provide eSIM functionality. For the most recent details on eSIM availability and activation, it is recommended to visit the official Simple Mobile website or get in touch with their customer service, since the availability of eSIM support is subject to change.

activate eSIM on Simple Mobile
Step-by-step guide to activate eSIM on Simple Mobile. Credit: Clark Howard

Activating an eSIM on Simple Mobile is a seamless process that requires a few simple steps:

Step 1: Check phone compatibility

Verify if your phone is compatible with Simple Mobile eSIM. Check the Simple Mobile website or contact their customer support for this information. Not all phones support eSIM, so it’s crucial to ensure compatibility. 

You can also visit here for a list of phones that support eSIM technology.

Step 2: Purchase an eSIM activation kit

Obtain a Simple Mobile eSIM activation kit. You can buy this kit online or from selected retail stores. The activation kit will include a QR code necessary for activating your eSIM.

Step 3: Activate the eSIM

To activate your eSIM, go to https://www.simplemobile.com/activation and follow the instructions.

Step 1: Access your phone’s settings

Step 2: Navigate to “Cellular” or “Mobile Data.”

Step 3: Choose “Add Cellular Plan” or “Add Data Plan” 

Step 4: Follow the instructions to scan the QR code provided in your activation kit.

Step 4: Verify activation

After adding the Simple Mobile eSIM, there might be a need for verification through a Simple Mobile representative. Follow the instructions provided by Simple Mobile to complete this verification process.

Step 5: Confirmation of activation

Once your Simple Mobile eSIM is activated and verified, you’ll be able to utilize cellular data, make calls, and send texts using your Simple Mobile plan.

Remember: eSIM is not supported by all plans and carriers. Before making the transition to eSIM, it’s a good idea to confirm that your phone and carrier are compatible with and support this technology.

Remember that the following must be available for you to use at the time of activation.

  • The Digital SIM IMEI of your phone.
    • If you have an iPhone 15, provide the Digital SIM IMEI or IMEI2. 
    • If you have an iPhone 14, provide the Digital SIM IMEI or IMEI2.
    • If you have an iPhone 12, provide the Digital IMEI2.
    • If you have a Simple Mobile-branded iPhone 13, or eSIM-capable SE, provide your Digital IMEI2.
    • If you bring your own iPhone 13 or SE, provide the Digital IMEI or IMEI2.
  • Your phone, with a minimum of 50% battery life remaining.
  • Data connection (Wi-Fi or cellular via the actual SIM card or accessible IMEI on the phone).

In the event that Wi-Fi is unavailable and you own an iPhone 14 or 15, you can proceed without it if requested.

FAQs

Frequently asked questions about Simple Mobile eSIM activation

1. Does Simple Mobile support eSIM?

As of the latest information available, Simple Mobile has started to support eSIM technology. However, it’s recommended to check the official Simple Mobile website or contact customer support for the most up-to-date information.

2. How long does it take to activate eSIM on Simple Mobile?

The activation time for eSIM on Simple Mobile can vary. In most cases, the process is quick and should be completed within a few minutes. However, factors such as device compatibility and network conditions may influence activation times.

3. Why is Simple Mobile eSIM activation not working?

If you encounter issues with eSIM activation, ensure that your device and plan support eSIM. Double-check the activation code and follow the steps outlined in the device settings. If problems persist, contact Simple Mobile customer support for assistance.

4. What is the activation code for Simple Mobile?

The activation code for Simple Mobile eSIM will be provided by the carrier upon purchase or activation of the eSIM service. It is a unique code that associates your device with your Simple Mobile eSIM.

Wrap Up

Simple Mobile’s eSIM activation brings enhanced flexibility and convenience to users. By following the activation steps outlined above and addressing common concerns through the FAQs, you can seamlessly transition to the cutting-edge world of eSIM with Simple Mobile. For the most accurate and up-to-date information, always refer to official documentation or contact Simple Mobile customer support. 

Experience the future of mobile connectivity with Simple Mobile eSIM activation. Elevate your mobile experience with Simple Mobile—simplify, connect, and thrive!

Spectrum Mobile eSIM Activation: How to Activate eSIM on Spectrum

Spectrum Mobile eSIM Activation: How to Activate eSIM on Spectrum

In today’s digital era, staying connected is crucial. Spectrum Mobile’s eSIM activation has completely changed the way we use our phones. Users may now conveniently access several phone numbers on a single smartphone thanks to this breakthrough technology, which offers unmatched convenience. Customers may activate eSIM on Spectrum Mobile by following a few easy steps. The eSIM from Spectrum Mobile ushers in a new era of mobile communications that offers unparalleled efficiency and flexibility. Let us now proceed to activate eSIM on Spectrum Mobile.

Activate esim on Spectrum Mobile from website

By visiting mobile.spectrum.com/activate and entering their username and password, former Spectrum Mobile users can access their accounts. Before you activate your new device, create an account if you don’t already have one. To create an account with Spectrum Mobile, follow these steps:

Step 1: Navigate to the Sign-Up Page

Begin by opening your web browser and going to the sign-up page. You can do this by typing the URL in the address bar or following a link provided.

How to Activate eSIM on Spectrum Mobile
How to Activate eSIM on Spectrum Mobile. Credit: Android Authority

Step 2: Choose Account Information

Once on the sign-up page, you will encounter two options: “Account Info” and “Contact Info.” Make a decision on which section to proceed with based on your preference.

Step 3: Provide Contact Information (If Choosing ‘Contact Info’)

If you opt for “Contact Info,” you will have the choice to enter either your phone number or email address. This step is crucial for communication purposes.

Step 4: Enter Account Information (If Choosing ‘Account Info’)

Alternatively, if you select “Account Info,” be prepared to input your account number and security code. Retrieve this information from your billing statement, order confirmation email, or a text message.

Step 5: Streamline the Process with ‘Contact Info’

Consider using the “Contact Info” option to simplify the sign-up process. This may be a more straightforward choice, depending on your preferences and the information you are comfortable providing.

Step 6: Verify Your Humanity with Captcha

Mark the Captcha box to confirm that you are a human and not a bot. This step is in place to enhance security.

Step 7: Follow Instructions to Complete Sign-Up

Proceed as directed on the screen to complete the sign-up procedure. The instructions may include additional information or steps needed to finalize the registration.

Step 8: Store Login Information Securely

As a precautionary measure for future reference, make sure to store your login information securely. Consider using a password manager or a designated secure location to keep this sensitive information safe and easily accessible when needed.

You will receive an email confirmation as soon as the registration procedure is complete. Look at the dashboard to see if there are any outstanding procedures or service agreements to finish. 

You can activate your Spectrum gadget by moving on to the following stage after completing the aforementioned requirements.

Activate eSIM with Spectrum Mobile app

Spectrum Mobile Activation Guide

Spectrum Mobile Activation Guide

Credit: Best Bundle Deals for TV Internet and Phone

It’s quite simple to activate your Spectrum Mobile phone or SIM card. Utilise the steps listed below to activate your Spectrum gadget. Please take note that the process outlined below is limited to activating a single device at a time. It is not possible to activate several Spectrum devices using the same account. Take the following actions as directed below:

Step 1: Ensure Your Device is Off

Before starting the activation process, make sure your device is powered off. Do not switch it on until the activation is complete.

Step 2: Insert Spectrum Mobile SIM Card

Take out the SIM card tray from your mobile device and insert the Spectrum Mobile SIM card securely.

Step 3: Access Spectrum Mobile Activation Page

Open the web browser on your PC or smartphone and navigate to spectrummobile.com/activate. Log in to your Spectrum Mobile account using your username and password.

Step 4: Locate Your Device

After logging in, check the dashboard to locate the specific device you want to activate Spectrum Mobile services on.

Step 5: Choose Activation Option

You’ll be prompted to choose between activating with an existing number or a new one. If transferring your phone number, enter account information from the previous network.

Step 6: Provide Carrier’s Login Information

If opting for “Go with an existing number,” provide the required login information for your current carrier.

Step 7: Initiate Activation

Tap the start activation button and follow the on-screen instructions provided.

Step 8: Confirm Activation Completion

If you follow the instructions correctly, a message saying “Activation complete, your device is ready for setup” will appear on the screen.

Step 9: Receive Confirmation Email

After successful activation, check your email for a confirmation message. Follow the on-screen directions in the email to complete the setup and activate your gadget.

Step 10: Wait for Activation

Depending on whether you choose an existing or new number, the activation process may take a few minutes to complete.

Step 11: Check Confirmation Email

An email confirming the activation will be sent to the address you registered with.

Step 12: Power On and Connect to the Internet

Turn on your new device and connect it to the internet to configure the settings.

Step 13: Follow On-Screen Instructions

Launch your device and follow the on-screen instructions to begin using it.

Step 14: For Apple Users: Gather Apple ID Details

If you use Apple products, gather your Apple ID details. If you use Android, gather the necessary details related to your aim for correct activation.

Step 15: Automatic Functionality of Spectrum Mobile SIM

Once your mobile device is set up, the Spectrum Mobile SIM card will begin to function automatically.

You can now enjoy making and receiving calls, sending messages, and a lot more with your device. Your Spectrum Mobile and/or SIM card is now activated. You can use it effectively now.

Troubleshoot Spectrum Mobile eSIM activation issues

When activating a new handset, “Your number could not be transferred” is a frequent issue.

If you filled in your name, account number, account or number transfer PIN, and billing address when transferring your phone number to Spectrum Mobile, and you received an error message, check your Activation Dashboard to make sure all of the information is correct. 

Your phone number has to be active with your current service provider until the transfer is finished in order for it to be transferred. If your number is no longer active, you can “Get a New Number” to proceed with the Spectrum Mobile device activation procedure.

Please attempt the next repair below to activate Spectrum Mobile on your handset if the problem continues, or get in touch with your former carrier for more help.

  1. Check if you can activate your smartphone on the Spectrum Mobile Network.
  2. Make sure your phone or tablet isn’t locked by getting in touch with your previous provider.
  3. For the Spectrum Mobile Network to perform properly, the most recent software update for your device is required.
  4. Verify that your SIM card for Spectrum Mobile is inserted correctly. 
  5. Turn off and restart the gadget.
  6. Check for any outstanding service agreements by logging in. Nevertheless, you won’t be able to activate your device if you haven’t signed all the necessary paperwork.
  7. Verify whether you currently have full service at your current location.
  8. If appropriate, make sure your SIM card is inserted correctly.
  9. If you turned on your new device before the activation was finished, restart it and carry on.

FAQs

Frequently asked questions of Spectrum eSIM activation

1. Does Spectrum support eSIM?

Yes, Spectrum Mobile offers the ease of many numbers on one smartphone by supporting eSIM technology on compatible handsets. With the use of eSIM technology, Spectrum Mobile hopes to give its users convenience and flexibility so they can get the most out of their mobile experience.

2. How long does it take to activate eSIM on Spectrum?

On Spectrum Mobile, the eSIM activation process is usually quick, taking only a few minutes. All you have to do is follow Spectrum’s detailed instructions when it comes time to activate your eSIM. Your eSIM will activate quickly and be operational once the code has been recognised.

3. Why is my Spectrum eSIM code no longer valid?

There may be a few reasons why your Spectrum eSIM code is being flagged as invalid on occasion:

  • The code is no longer valid; eSIM codes often have an expiration date. 
  • A mistake in the code you were given. 

It is strongly advised that you get in touch with Spectrum’s customer service to rectify this issue and receive more help. 

Wrap Up

Make the most of your mobile experience by making the most of Spectrum Mobile’s eSIM powers for dependable and easy connectivity. Accept the future of mobile technology and learn about the unparalleled benefits that eSIM provides. With Spectrum Mobile’s cutting-edge eSIM technology, you can stay connected effectively and conveniently on the smartphone of your choice.

Would you want to share this tutorial with others about Spectrum eSIM activation? Discover the benefits of eSIM technology right now!

×
×